
Creating Fields
Click on the "Fields" tab in the backend of the component. You can see all default fields and whether they are required when writing ads. Below we will see how to add custom fields.
Click on the "New" Button and read details of the form down below.
Global paramaters
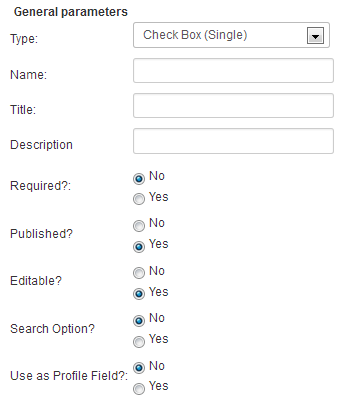
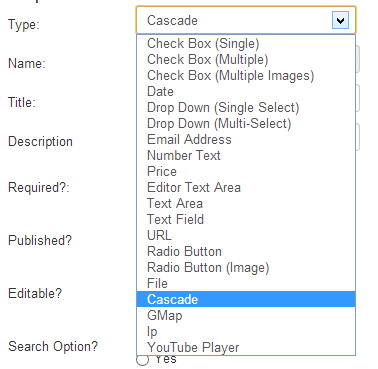
The available types are shown below

Search options means the field will be used in the search module with SimpleSearch or AdvanceSearch depending on your AdsManager pack. Check out the features documentation for more information.
Use as Profile means this field will be considered as a field in Community Builder.
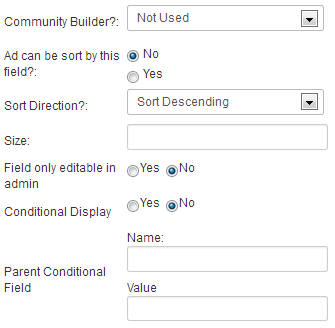
You can choose whether to use Community Builder or not if applicable. Everything works fine without Community Builder, we provide a simple interface to manage profiles of your users.
You can choose to let users to sort your ads by a field if you select yes and to choose the sorting directon.
Size is the size of the field, such as "50" . You also can choose whether you allow a field to be editable in the front-end or not.
Conditional fields
One powerful functionality with fields is the possibility to make them conditional. This means only display a field if another field has certain defined values. Combinations are pretty infinite til you can mix fields with different types. Below is a quick example :
Your ad is in a category, let's say, "Automobile/Boats", and assume that there will be different fields for automobiles and boats. If you want to show certain relevant fields only when in the boat category, you can do so using conditional fields.
Here an example of conditional fields.
1. Create the parent field
The parent field doesn't need a special configuration.
2. Create the child field
Once you've created the parent field, you need to create a new field, this one will be set to be displayed only if a specific value of the parent field is selected.
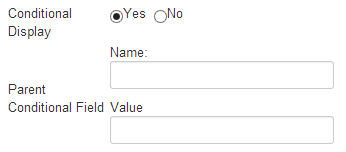
Set 'Conditional Display' to Yes and specify which values of the parent field will cause the current field to be displayed.
Tips : You can associate any fields like the two above and customize your ads form like you want.
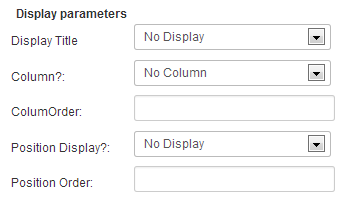
These fields are pretty easy to understand so we'll just describe the content of the dropdown select here:
Display Title:

Column:

If you don't know what columns are in AdsManager, see Creating columns. Otherwise you can assign which fields to display in the column and their ordering.
Position Display:
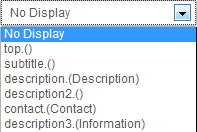
Important: field names are case-sensitive so be sure you exactly type the same name, you can copy/paste it.
Categories
Select which categories you want your field to appear. You can chose All Ads to select them all.

Dropbox fields
You have two way to add options to dropbox fields.
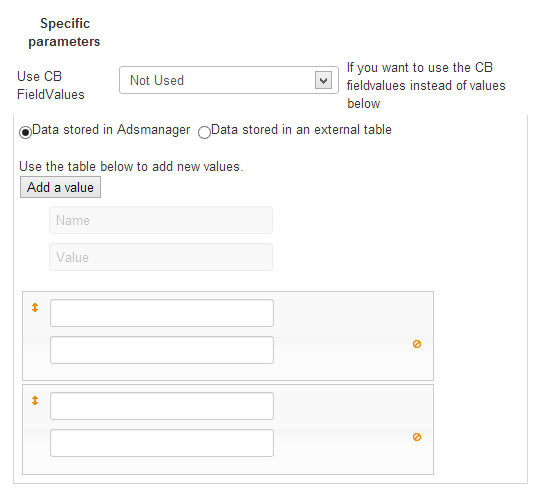
If you select the "Data stored in Adsmanager" option, you can fill the empty fields below in order to add options to the dropbox field.
Clicking on the 'Add a value' button will add new empty fields.
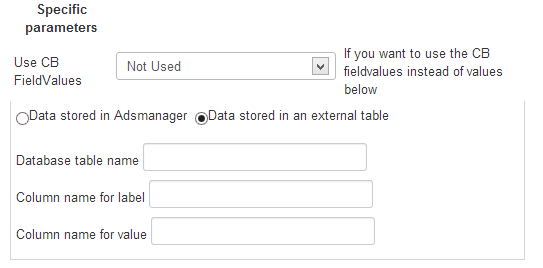
If you select the "Data stored in an external table", you just have to specify into which database table and columns.
The options list of the dropbox field will be filled with the content of the table.
Cascading fields
Cascading fields are a special type of field available with AdsManager Silver or Gold pack. This allows for the content of fields to depend on another. For example: you have two dropdown lists where users select a country and then a city. With cascading, when the user selects a country the list of available cities changes to match the selected country.
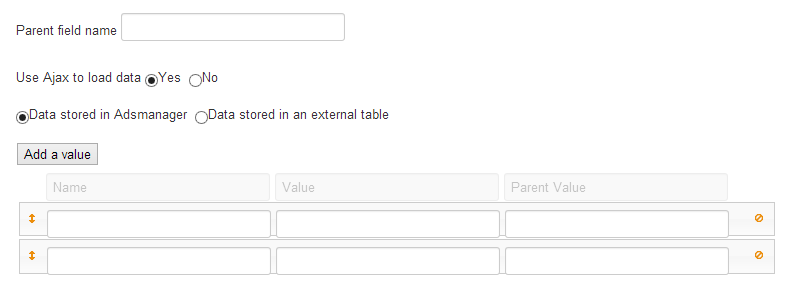
First, you need to select the cascade type field to display its options.
In the options of the field, you need to specify the name of the parent field.
You can choose to use Ajax to load the data.
If you choose yes, the child dropbox field will be displayed without a page reload, otherwise, the page will be reloaded.
Then, you need to set the values of the field to cascade on, you can fill these values the same way as you would for the parent field.
When users select a value of the parent field, all children who cascade on that value will be displayed.
Price field
The option in the price allow you to specify the currency you want and the range of the price search field.
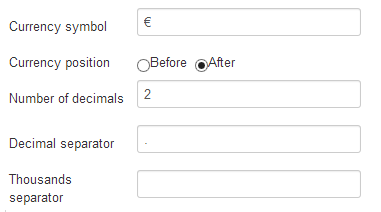
Currency symbol : The symbol of your currency
Currency position : The position of the symbol - before or after the price number
Number of decimals : The number of decimals after the decimal separator
Decimal separator : The separator between the number and its decimals
Thousands separator : The thousands separator
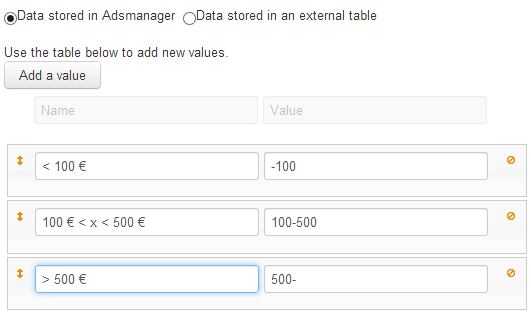
This fields allow you to set the available price range you want to display in the search form.
You need to fill the left column with the display value and the right column with a value formatted like the screenshot.
